Monday - Thursday 9AM - 5PM | Friday 9AM - 4PM
XTMS Support Page
Introduction to XTRAN for Elimination of Live Work
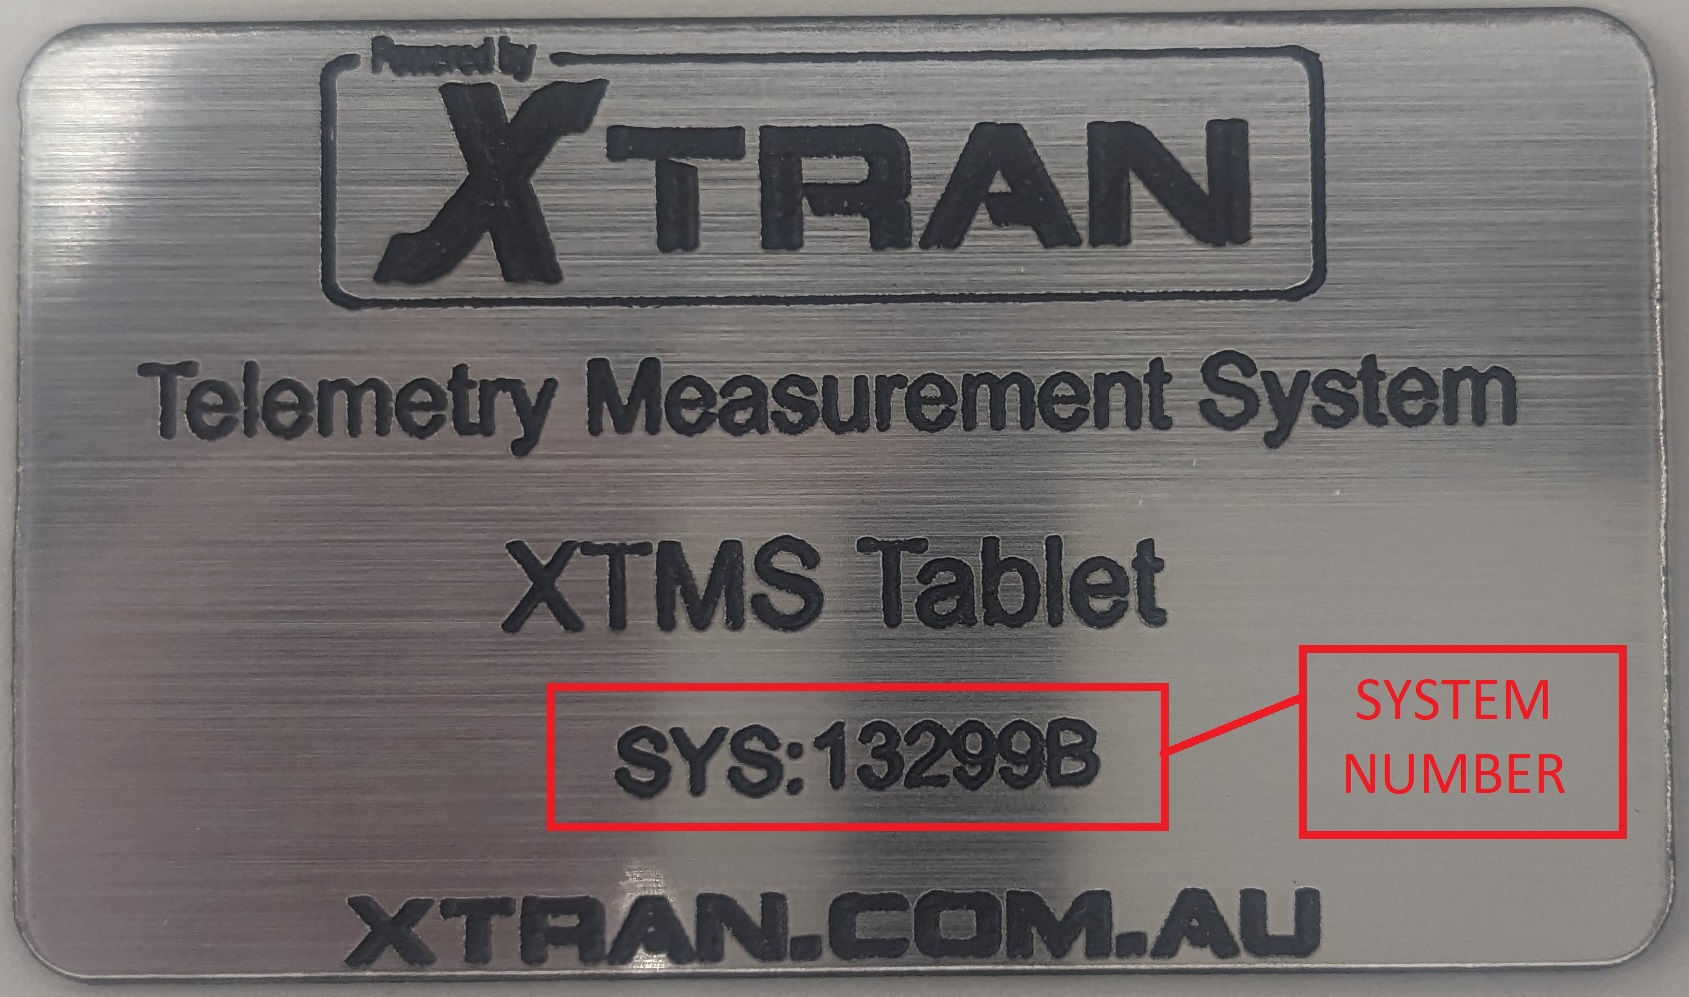
MID0001 XTMSP5KK10 XTMS50MMREK XTMS50MMREK System 2 XTMSRTK8 XTMSHTTK1 Once XTRAN Logging software appear on the screen. From the Main Menu, select the Asset you wish to test. Note: If the Asset is not in the Main Menu list please select “Generic Tests”. Note: For each different Asset, there is a designated measurement menu. For Generic Tests Note: The battery inside the Tachometer transmitter cannot be replaced Sensor info System numbers can be found on top of the XTMS Tablet Case, on the back of the XTMS tablet or printed on the sensor transmitter under the SYS: number. Example: SYS: 13299B061B where 13299B is the system number and 061B is the sensor number and type. Ensure that channel 15 is kept as its radio channel
What is an XTRAN System (what are all the parts)
System Type 1 & System Type 2 Breakdown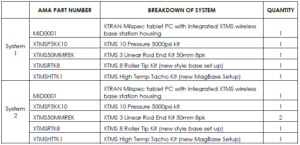

 How to power up the tablet
Press and hold the power button for 3 seconds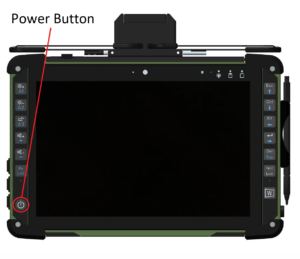
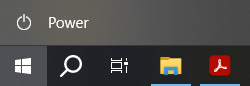
How to shut down the tablet
Press the power button or open the start menu, click the power symbol and click shut down
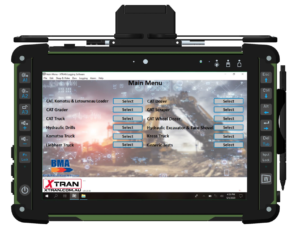
 How to select an asset
The XTRAN Logging software is already installed on to your tablet and will bootup with the device. It will take around 20 second for the software to show up on the device.
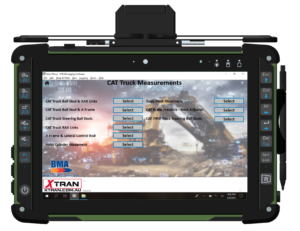
 How to select a measurement type
For Measurement Menu please select the type of measurement you wish to run.
 How to select a sensor type
Select the Sensor type from the “Sensor Type Menu” and proceed to Mount the desired sensors to the Asset.
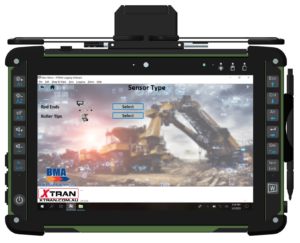
Skip to page 16, if you have already selected your sensor type.
You have a selection of four options:
-Generic Roller Tip Test
-Generic Rod End Test
-Generic Pressure Test
-Generic Tacho Test
Select the preferred option and mount the desired sensors to the Asset as required.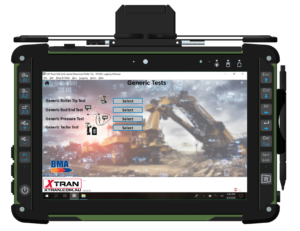
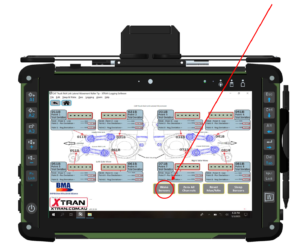
How to wake the sensors
From the visualisation screen of the selected measurement type. Click on “Wake Sensor” to turn on the sensors.
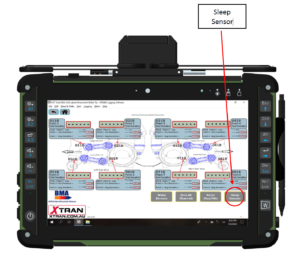
 How to sleep the sensors (to extend battery life)
After Collecting all the required data. Click on “Sleep Sensor” on the bottom of the screen to turn off all the sensor before storing away into case.
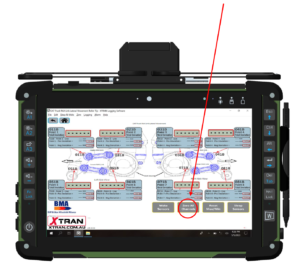
 How to zero the measurement
After mounting the sensors on the machinery, click on “Zero All Channels” to get all the measurement values to zero.
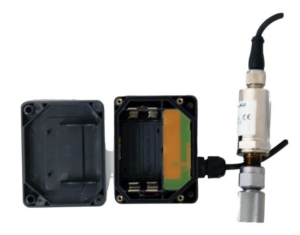
 How to replace the batteries
Batteries The Transmitter have two Standard AA batteries.
-Unscrew the screws on the transmitter receiver housing
-Replace The Batteries to a new pair
-Use Energizer Industrial AA Battery (recommended)
 How to replace a damaged sensor
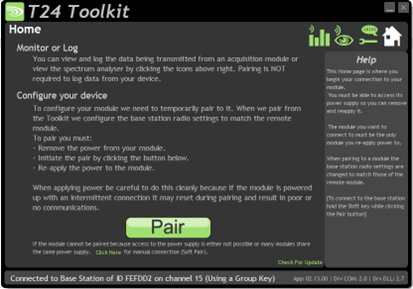
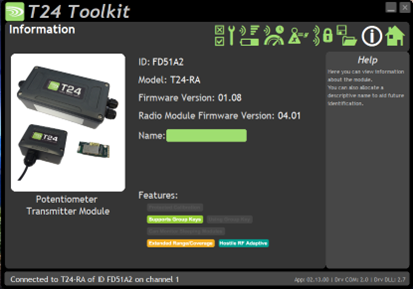
What is needed for configuration
How to configure
![]()

![]()
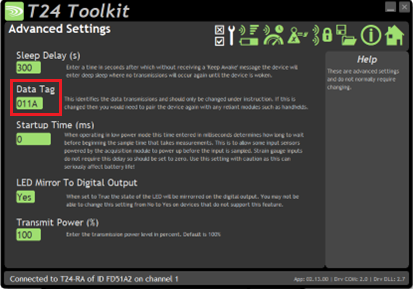
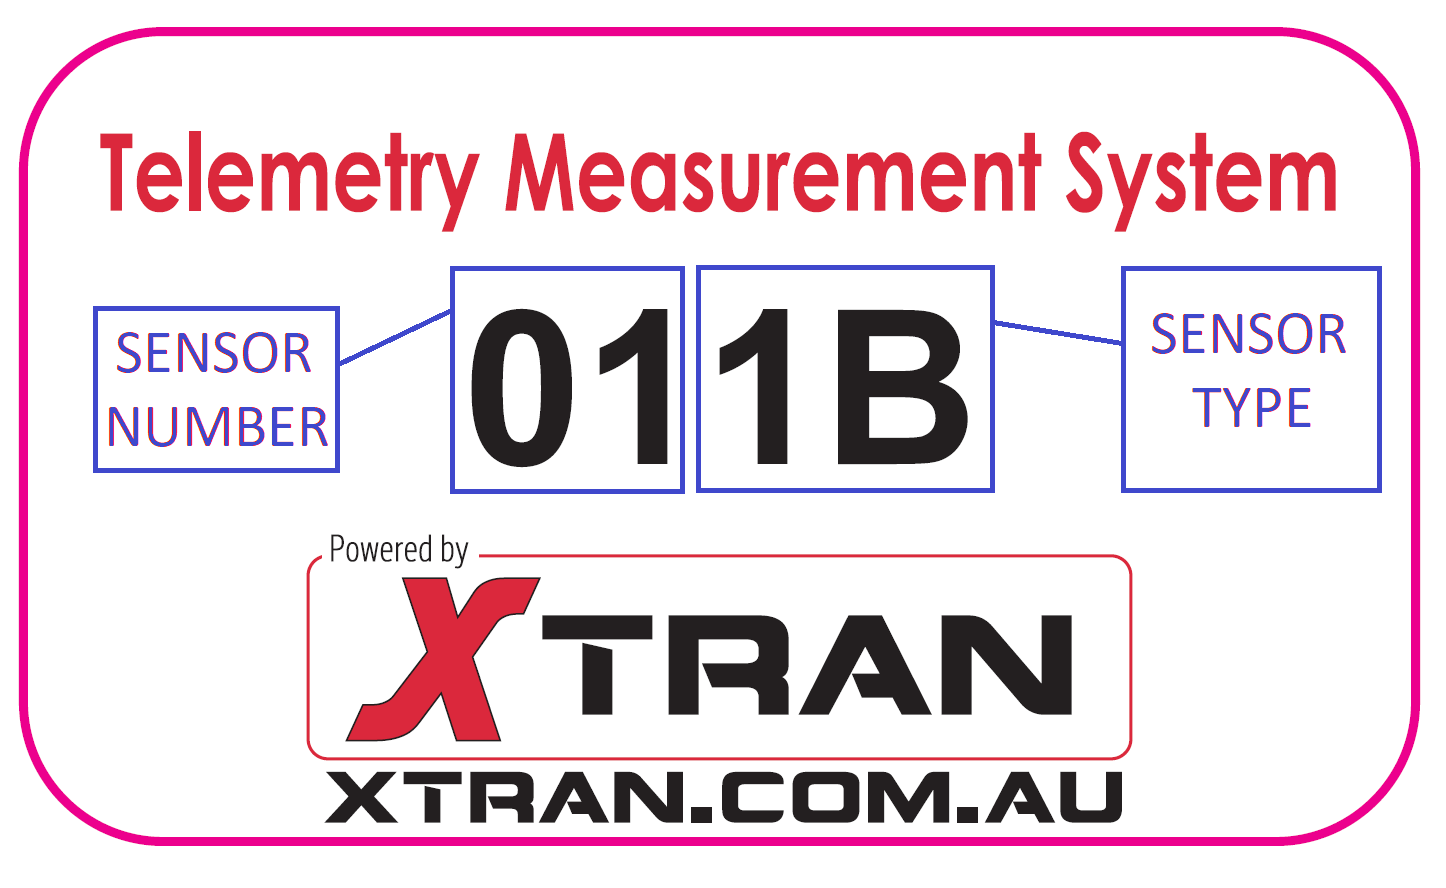
These numbers can also be found on the top label on the transmitter case as shown above or the side of the sensor or transmitter under SYS:Example: SYS: 13299B061B where 13299B is the system number and 061B is the sensor number and type.
If you are configuring a sensor replacing 061B roller tip sensor the “Data Tag” field below will need to be changed to “061B” or if you are configuring a sensor replacing 032A pressure transducer the “Data Tag” field below will need to be changed to “032A”
Sensor
Sensor Number
Sensor Type
50mm Rodend
01 to 16
1C
Roller tip
01 to 08
1B
5K PSI pressure
01 to 10
2A
Phototach
01
4B
![]()
Example Below How to check when the system was last calibrated
The Case after a calibration will have a sticker that has a QR code to be able to view all the certificates for each sensor in the kit along with the date the system was calibrated.